
Italian rosemary buns for a sticky-sweet Easter treat

The Perfect Loaf is a column from software engineer-turned-bread expert (and Food52’s Resident Bread Baker), Maurizio Leo. Maurizio is here to show us all things naturally leavened, enriched, yeast-risen, you name it — basically, every vehicle to slather on a lot of butter. Today, pan di ramerino, an Italian Easter-time sweet bun.
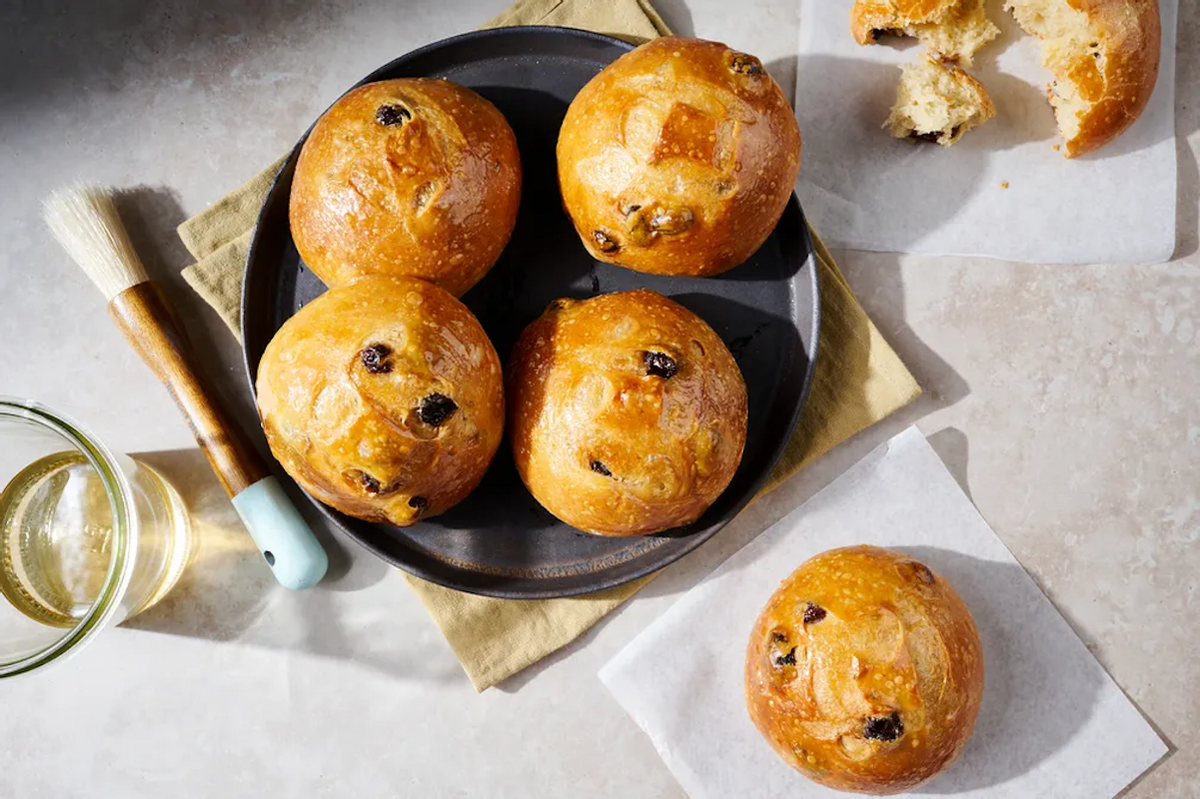
Pan di ramerino, or rosemary bread — a sticky and sweet little bun studded with raisins — is a traditional Easter-time treat commonly found in Tuscany, in the central part of Italy. They’re remarkable because they have an uncommon ingredient woven into an enriched dough: rosemary. While we often think of the woodsy, piney herb as a savory-only affair, it sometimes finds its way into the sweeter side of things. With these sweet buns, rosemary brings a gentle backdrop of savoriness that is unique, and its flavor is the highlight of these sticky and soft buns.
The dough for these buns can be made in a variety of ways with a variety of different enrichments, from milk to butter to extra-virgin olive oil, as I have done in my pan di ramerino recipe. All of these fats bring suppleness to the bun, and in my adaptation of this old-school pastry, I opt for a large quantity of only olive oil for extreme softness plus an added fruity and herbaceous flavor.
Let’s answer some pan di ramerino F.A.Qs. (I certainly wondered about them.)
Why add the olive oil after the initial dough-mixing?
When adding fat to dough it’s beneficial to hold back some, or all, during the initial dough mixing and strengthening. Fat — like butter, oil, or lard — impedes gluten formation due to the way it coats the proteins in flour (and their job is eventually to form gluten). By holding back some, or in this case all, of the fat in that first part, we give gluten a chance to develop and the dough to strengthen quickly and efficiently. This is why you’ll often see dough recipes instruct adding softened butter once the dough is strong enough to pass the “windowpane test.”
These sweet buns call for a substantial amount of olive oil added to the dough, which helps make the buns bake off with a soft texture, but if the oil was added all from the start of mixing, it would take many, many minutes more to strengthen the dough sufficiently (and possibly never reach the desired gluten development).
Why sourdough?
Pan di ramerino are typically leavened with commercial yeast, but, as I’m wont to do, I created a sourdough version where the flavors of natural fermentation are mild, yet still wholly evident. The dough isn’t fermented overnight at cold temperature, as some sourdough bread might be, which leads to minimal acidity in the final bun. But! Even though the acidity is minimal, it still brings ample flavor complexity to the dough. It’s like adding a secret layer of zing to your baked goods, much like a skilled baker might use almond or vanilla extract to heighten the flavor interplay amongst the other ingredients.
So, since we’re using naturally leavened sourdough in this dough for rise and flavor, we need to first take a look at the other ingredients and how they might affect fermentation — the most important on the list: sugar.
Why so little sugar in the dough?
I’m not a big eater of sweets. Sure, I’ve been known to eat a doughnut or two on occasion, but for the most part, my baking recipes lean toward doughs with less sugar and little adornment at the end. However, when developing the recipe for these sweet buns, I started with the sugar a little on the high side at 15% to the total flour weight. For sourdough, that high sugar content directly translates to long fermentation times, as it impedes fermentation activity. Using instant yeast, especially an osmotolerant variety, which is specifically designed to thrive in high-sugar or salt environments, doesn’t have this problem — which is typically why you’ll see recipes for yeasted brioche or other bread and pastry call for a specific type of, often osmotolerant, yeast.
So what does this have to do with these little buns? When I had sugar at 15% to total flour, the total fermentation time required to properly ferment the dough was incredibly long, and in my cold, winter kitchen, it required an overnight bulk fermentation on the counter — far longer than I prefer to wait for buns. Further, after baking the buns, they tasted overwhelmingly sweet. While you might see instant yeasted recipes for these sweet buns have a higher sugar content, I find with sourdough, and its subtle acidic flavor built up during fermentation, all flavors are amplified (much like a gentle squeeze of lemon juice over many foods awakens the palate).
In the end, and through subsequent testing, dropping the sugar all the way down to 6% of the total flour in the recipe (that’s going from 60 grams of sugar all the way down to 27) yielded a more typical bulk fermentation time of 4 hours, plus a shorter final proof of 3 hours. Bonus: the flavor was spot on — buns that are a touch sweet, savory, and with a gentle pop from the acidity in the dough.
Wait — Are they hot cross buns?
While I admit these small, sticky buns do look somewhat similar to the crisscrossed Easter treat, these pan di ramerino couldn’t be more different, both in flavor and texture. Hot cross buns have a completely are spicier, with nutmeg, cinnamon, and sometimes allspice. They’re typically softer, given the addition of butter and milk in the dough. While hot cross buns are of course sweet (especially with their simple syrup glaze), the flavor is where hot cross buns go left and pan di ramerino goes right. The fruity olive oil and piney rosemary notes in pan di ramerino puts them in a class of their own.
I hate raisins! Can I use another dried fruit in these buns?
Raisins are without a doubt the traditional fruit for these sweet buns, but I could see so many additions working very well with this dough. In taking cues from hot cross buns, try adding soaked and drained Zante currants, which are like mini-raisins after all. I could also see proper currants (the small black or red berry) working well in these buns, which would bring tartness and intensity not found in raisins. If adding proper currants, I’d likely half the amount added to the dough so as not to overwhelm. I’m also keen on trying these with dried and chopped apricots (a favorite dried fruit of mine) which go very well with rosemary and other herbs.
***
Recipe: Sourdough Pan di Ramerino
Cook Time
40 minutes
Ingredients
Dough
- 90 grams raisins (Thomspon or golden)
- 336 grams water, divided
- 460 grams all-purpose flour, plus more as needed
- 151 grams ripe sourdough starter, 100% hydration
- 27 grams superfine or granulated sugar
- 9 grams fine sea salt
- 2 large eggs
- 1 large egg yolk
- 50 grams extra-virgin olive oil
- 3 grams (about 1 tablespoon) washed and finely chopped fresh rosemary leaves
- 15 grams (1 tablespoon) whole milk
Glaze
- 50 grams water
- superfine or granulated sugar
Directions
- Feed sourdough starter and soak the raisins (night before mixing at 9:00 p.m.)
In a small airtight container with a lid, combine the raisins and 100 grams of the water (use enough water so they’re just covered). Cover the bowl and leave it out on the counter. Feed your sourdough starter around this time to give it 12 hours of fermentation time.
- Mix the dough (9:00 a.m.)
In the morning, your starter should be bubbly on top and at the sides, have risen in the jar, have a sour aroma, and with a loose consistency. If it was cold in your kitchen overnight or the starter isn’t displaying these signs, give it one more hour to rise and check again.
To the bowl of a stand mixer fitted with the dough hook attachment, add the remaining 236 grams water, 460 grams flour, 151 grams ripe starter, 27 grams sugar, 9 grams salt, 1 of the eggs, and 1 egg yolk. With the mixer to low speed, mix until the ingredients are combined and no dry bits of flour remain. If the dough looks very dry, drizzle 1 scant tablespoon of water to the mixing bowl with the mixer running to help hydrate the flour. Increase the mixer speed to medium-low and mix for 5 to 6 minutes, until the dough starts to clump around the dough hook. At this point, the dough should be strong enough to partially pull away from the bottom and sides of the mixing bowl. If the dough still looks very wet and does not remove from the sides of the bowl, add more flour by the tablespoon and mix for another 1 to 2 minutes until incorporated.
Let the dough rest for 10 minutes in the mixing bowl, uncovered.
With the mixer on low speed, slowly drizzle in the olive oil in small bursts, about 4 to 6 minutes total. Once all of the oil is added, increase the mixer speed to medium-low and continue to mix until the dough smooths and once again begins clinging to the dough hook, 2 to 3 minutes. Scatter the rosemary on top of the dough. Drain the raisins of their water, squeezing out a bit more with your hands, and add to the top of the dough. With the mixer on to low speed, mix until the inclusions are mostly distributed, about 1 minute. At the end of mixing, the dough will be very soft, but will firm back up during bulk fermentation.
Transfer the dough to another large container (or leave it in the mixing bowl) for bulk fermentation.
- Bulk ferment the dough (9:30 a.m. to 1:30 p.m.)
Cover the dough with a reusable airtight cover and let it rise at warm room temperature (76°F/24°C) for a total of 4 hours. During this time, you’ll give the dough two sets of “stretches and folds” (see next instruction for explanation) to give it additional strength.
To stretch and fold: after 30 minutes of bulk fermentation, uncover the dough. Wet your hands, grab the north side (the side farthest from you) of the dough, and stretch it up and over to the south side. Then, stretch the south side up to the north. Then, perform two more folds, one from east to west and one from west to east. Cover the dough and let it rest for 30 more minutes, then give it another set of stretches and folds. Let the dough rest, covered, for the remaining 3 hours of bulk fermentation.
- Divide and shape the dough (1:30 p.m.)
Check the dough; after 4 hours, it should have risen in the bulk fermentation container, have a few scattered bubbles, be smoother, with a slightly domed top, and be moderately light and fluffy to the touch. If the dough still looks sluggish or feels dense after 4 hours, give it another 30 minutes to rise in a warm spot, like your oven turned off with the light on the inside (74 to 76°F/23 to 24°C).
Line two 13×18-inch sheet pans with parchment paper. Flour the top of the dough and use a bowl scraper to gently scrape it out onto a work surface, flour-side down. Flour the (new) top of the dough. Using a bench scraper and floured hand, divide the dough into 12 (90-gram) pieces (you might have a little scrap dough leftover: discard or bake it off).
Using as much flour as necessary to help prevent the dough from sticking to your hands and the work surface, shape each of the 12 pieces of dough into a very tight ball by pushing, twisting, and dragging the dough against the work surface with the bench scraper. Pushing and pulling will create tension on the top of the dough, creating a uniformly smooth surface.
After shaping each ball, transfer to a prepared sheet pan (6 per pan with even spacing between them). Cover the sheet pans with a large plastic bag, plastic wrap, or sheet pan cover and seal.
- Proof dough (1:45 p.m. to 4:45 p.m.)
Proof the dough at a warm temperature (74 to 76°F/23 to 24°C is ideal) for about 3 hours. If your kitchen is on the cool side, expect the dough to take longer to proof. Extend the proof time as necessary until the dough is puffy — a gentle poke should feel like poking a marshmallow.
- Bake and finish (4:45 p.m.)
Heat the oven to 425°F (220°C) with racks in the top and lower third. In a small bowl, whisk together the remaining 1 egg and 15 grams of milk for the egg wash.
Using a pastry brush, lightly brush the surface of each piece of dough with the egg wash. Using a razor blade, baker’s lame, or sharp knife, score each piece of dough at the top-center with a pound sign (“#”) on top. Due to the soft dough, it can be challenging to score: move quickly with your blade, but it’s OK if the score isn’t clean and precise (they’ll bake up delicious regardless). Slide the sheet pans into the oven, and bake for 20 minutes. Rotate the baking sheets back to front and top rack to bottom rack. Reduce the oven to 350°F (175°C) and bake for another 15 to 20 minutes, until the buns are golden-brown and the internal temperature is around 200°F (93°C).
While the buns bake, make the simple syrup, in a small saucepan over medium heat, bring the 50 grams of water to a boil. Once boiling, pour in the 50 grams of sugar, stirring to help dissolve. Bring back to a boil then remove from the heat. Set aside to cool.Remove the buns from the oven, and using a pastry brush, immediately apply a thin layer of the simple syrup (you will have some leftover, see headnote). Let the buns cool for 15 minutes before eating.
These buns are best the day they’re baked but keep in an airtight container and on the counter. Reheat them in a 350°F oven for a few minutes before serving.